This article may contain affiliate links. If you buy through them, Mornings and Mascara may earn a small commission at no extra cost to you. Learn more.
Creating photogenic makeup requires more than just skill; it demands an understanding of skin tones and formulations that enhance one’s natural features. Photogenic makeup should photograph well under various lighting conditions while ensuring a seamless finish that retains depth and dimension. This guide delves into techniques and product choices tailored to different skin tones, focusing on how to achieve a polished look that translates beautifully in photos.
Basics of Photogenic Makeup
The first step in creating a photogenic look is to prepare the skin adequately. This includes cleansing and moisturizing, but it’s essential to consider the lighting conditions in which the photos will be taken. For instance, in dim light, a slightly glowy finish can enhance facial features, whereas bright light necessitates a more matte look to avoid excessive shine.
Foundation plays a critical role in this process. Selecting the right shade involves understanding undertones, which can be broadly categorized into warm, cool, and neutral. A foundation’s undertone impacts how it appears on the skin, especially under the scrutiny of a camera lens. For example, a warm yellow-based foundation can make skin appear radiant in photographs, while a cool pink-based one may bring out any redness in the skin.
Creating the Perfect Base
For my own routine, I often reach for a medium-coverage foundation that can be built up where needed. My favorite is a water-based formula that strikes a balance between longevity and a natural finish. A good foundation with a pigment load that allows for coverage without opacity is crucial. When applied with a damp sponge, it provides a soft, skin-like finish that looks photogenic.
Choosing the Right Formula
When considering foundation formulas, both liquid and cream foundations generally work well for most skin types. Those with oily skin may benefit from a matte formula that contains silica or other oil-absorbing ingredients, which can reduce shine during extended wear. Conversely, dry skin can benefit from a hydrating foundation, which often includes emollients such as glycerin or squalane to give a dewy look.
Application Techniques
Technique matters significantly in achieving a photogenic finish. Use a stippling motion with a makeup sponge to blend foundation seamlessly into the skin. This method ensures that the product adheres well and reduces the appearance of brush strokes or unevenness. Additionally, setting the foundation with a finely milled powder can help to create a smooth canvas while ensuring that the makeup doesn’t reflect too much light, which can be unflattering in photos.
Enhancing Features with Contour and Highlight
Contouring and highlighting are essential steps that can define features and add dimension to the face. For contouring, choose a shade that is one to two shades deeper than your foundation. Cream formulas are often preferable for a natural look, as they can be blended seamlessly into the skin.
On the other hand, highlighters should complement your skin tone. For fair skin, consider soft champagne or pearl shades, while medium skin can pull off warm golds or bronzes. Deeper skin tones often look stunning with rich copper or bronze hues. When applying highlighter, focus on the high points of the face, like the cheekbones, bridge of the nose, and the cupid’s bow.
Color Theory in Contouring
A noteworthy point about contouring is the use of color theory. For instance, using a grayish-brown contour can mimic natural shadows on fair skin, while deeper skin tones may require a warmer contour to avoid looking muddy. This principle is rooted in understanding how colors interact with one another, particularly when photographing various skin tones.
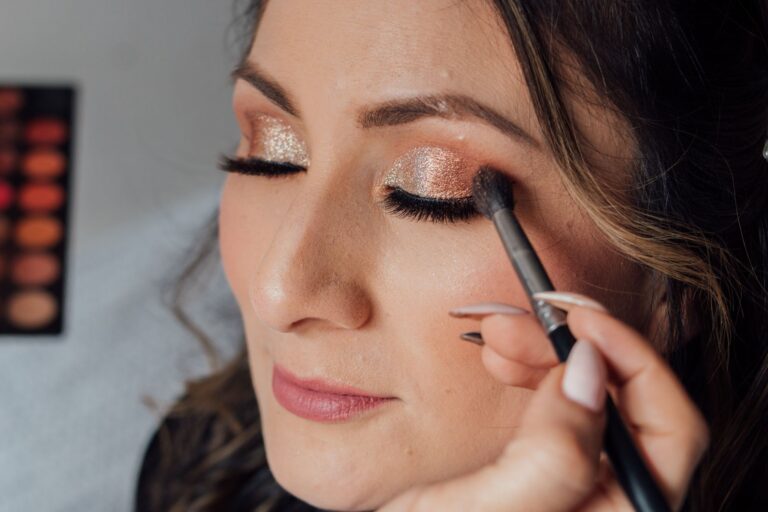
Eyes: The Window to Your Makeup
The eyes are pivotal in achieving a photogenic look. When it comes to eyeshadow, neutrals are versatile and photograph beautifully. Depending on your skin tone, consider warm taupes for lighter skins, soft oranges for medium tones, and deep, rich acts for darker complexions. These colors provide depth without overpowering the overall makeup look.
Liner and Mascara
To define the eyes further, pencil, gel, or liquid liners can be used. A general tip is to opt for dark browns or blacks depending on personal preferences and skin tone. For those who may struggle with eyeliner application, a tightlining technique, applying liner directly to the waterline, can create the illusion of fuller lashes without a heavy makeup appearance.
As for mascara, look for formulas that provide volume and length. I personally prefer ones that are smudge-proof to ensure a clean look throughout the day. This is particularly important for events where prolonged wear is expected. A few coats of mascara can elevate the entire look, making the eyes pop effortlessly.
Lips: The Finishing Touch
Selecting the right lip color can tie a makeup look together beautifully. For everyday wear, I gravitate towards nude shades with a hint of pink or peach, as they enhance the natural lip color without being overpowering. For occasions that demand a bit more drama, bold reds and deep berries can make a striking statement. The key is to consider your skin undertone; warm-toned individuals may find that orange-based reds suit them better, while cool-toned individuals should gravitate toward blue-based shades.
Long-Lasting Lip Options
To ensure longevity, a lip liner is a fundamental step. It not only helps maintain the shape of the lips but also creates a base that prevents feathering. Choose a lip liner that closely matches your chosen lipstick shade. Incidentally, this is a trick that dates back to the 1980s, a time when lip liners became a staple in makeup kits, primarily to combat the challenging wear of bold lip colors.
Setting Your Makeup
Finally, setting your makeup is essential for ensuring its longevity and maintaining a fresh appearance. A setting spray can provide a final layer of hydration and keep everything in place. Look for sprays that have a matte-finish if you’re prone to oiliness or a dewy finish for dry skin. This final touch can significantly affect how the makeup looks in photographs, as it creates a seamless blend between the skin and the products applied.
Special Considerations for Different Skin Tones
- Fair Skin: Use lightweight foundations with a neutral or rosy undertone to balance any redness.
- Medium Skin: Opt for warm undertones in foundation and consider peachy blushes for a natural glow.
- Deep Skin: Choose rich tones that complement the natural warmth in the skin; vibrant eyeand lip colors can be particularly striking.
Conclusion
Creating photogenic makeup tailored to various skin tones is a nuanced process that combines the right products with an understanding of color theory and application techniques. By focusing on the specifics, like undertones, formulas, and techniques, you can achieve a polished look that not only photographs well but also feels authentic to your personal style. Finding what works best for your unique complexion is a journey worth taking, and the confidence that comes from mastering these elements is truly rewarding.