This article may contain affiliate links. If you buy through them, Mornings and Mascara may earn a small commission at no extra cost to you. Learn more.
Blending eyeshadow is a crucial skill that can elevate your makeup game, transforming a basic look into something polished and professional. The process involves more than just moving color around your eyelids; it requires an understanding of how pigments interact, the tools at your disposal, and how to manipulate light and shadow. I often find myself reaching for specific techniques that not only enhance my eye shape but also create depth and dimension, and I want to share those with you.
Understanding Pigment Properties
To grasp the intricacies of blending, one must first understand the properties of the pigments involved. Eyeshadows can come in various formulations, including matte, satin, shimmer, and metallic. Each type behaves differently when applied, which directly affects how they blend. For instance, matte shadows generally offer more intense color payoff and are easier to blend seamlessly due to their lack of shine, which helps avoid the risk of harsh lines.
Conversely, shimmer and metallic formulas tend to have a more slippery feel due to the larger particle size of their reflective ingredients. This can make them trickier to blend, especially if the base layer is matte. It’s wise to apply shimmer shades with a light hand and build them gradually, allowing you to control their placement and intensity. For example, I’ve often used the Urban Decay Moondust Shadows, which are highly pigmented and have a unique texture that requires careful blending to prevent fallout and achieve a soft focus effect.
The Right Tools for Seamless Blending
Your choice of tools plays a pivotal role in the blending process. Brushes vary widely in shape, size, and bristle density, which can significantly affect application and blending. A loosely packed, fluffy brush is ideal for diffusing color, whereas a denser brush works well for packing on color.
One of my go-to tools is the Sigma E40 Tapered Blending Brush. Its softness and shape allow for effortless blending of shadows, especially in the crease area. I find that the tapered edge enables me to reach both the outer corners and the inner crease without applying too much pressure, which can disrupt the pigment and create patchiness.
Applying a Transition Shade
Creating seamless transitions often begins with a transition shade, which is typically a neutral hue that lies between your eyelid and brow bone colors. This shade acts as a bridge, helping darker and lighter shades blend smoothly together. For a natural look, I often choose a soft beige or warm taupe, applying it with a light hand above the crease. It’s essential to use a large, fluffy brush to prevent harsh lines, allowing the pigment to diffuse naturally.
Layering Techniques for Depth
Layering is another integral technique for achieving depth in your eyeshadow looks. When applying multiple shades, the order and technique can significantly influence the final outcome. I usually start with the lightest shade on the lid and gradually build up darker shades in the crease and outer corners. This not only enables a smoother blend but also emphasizes the shape of the eye.
For example, if I’m opting for a warm sunset eye, I’ll lay down a soft peach on the lid, moving into a burnt orange in the crease, and finally deepening the outer corner with a rich burgundy. Each layer should be blended before adding the next to avoid any muddiness. As I layer, I make sure to switch brushes as needed; I typically use a denser brush for packing on color and switch back to a fluffy brush for blending.
Blending Techniques: Circular and Windshield Wiper Motions
There are varied techniques for achieving an impeccable blend, two of which stand out: circular motions and windshield wiper motions. Circular motions help to diffuse product and create soft edges, while windshield wiper motions can effectively place shadow in the crease with controlled precision.
I find the circular motion particularly useful when blending the outer corners, allowing for a soft gradient. For instance, when applying a dark shade to the outer V of my eye, I use small circular motions to ensure that the pigment disperses evenly. Windshield wiper motions, on the other hand, offer control when I’m deepening the crease. I typically place my brush at the outer corner of the crease and move it back and forth, gradually building up depth without harsh lines.
Color Theory in Blending
Understanding color theory can also enhance your blending game. Complementary colors, those located opposite each other on the color wheel, can create striking contrasts when blended well. For example, blending a warm brown with a cool-toned blue can yield an intriguing, dimensional effect. It’s essential to ensure that the complementary colors are well balanced, as one shade can easily overpower the other if not applied with care.
Another important aspect of color theory is knowing the undertones of the shades you’re using. Warm shadows often have a yellow or peach undertone, while cool shadows may lean towards blue or gray. When blending, it’s crucial to consider the undertones of the colors to achieve harmony in your look. For instance, if I’m looking to create a soft daytime look, I’ll opt for warm beige and soft coral shades; however, if I’m going for a more dramatic evening look, I might select deep plums and cool taupes.
Common Mistakes to Avoid
Even seasoned makeup enthusiasts can fall into pitfalls when blending. One common mistake is using too much product at once. Applying an excessive amount of shadow can lead to a patchy or overly harsh appearance, making seamless blending difficult. Instead, build color gradually, using the right brush for the desired effect.
Another frequent error is neglecting to clean your brushes. Residue from previous applications can lead to a muddied look and hinder the blending process. Regular cleaning not only prolongs the life of your brushes but also ensures optimal pigment performance. I recommend using a gentle brush cleaner or a daily spray cleaner for quick touch-ups between applications.
Final Touches for a Cohesive Look
Once the blending is perfected, it’s crucial to pay attention to the finer details. Consider applying a highlight to the brow bone and inner corner of the eye to brighten and lift the look. This contrast can enhance the overall blending by adding light and dimension. I usually reach for a soft champagne highlight, which complements most eye looks without overpowering them.
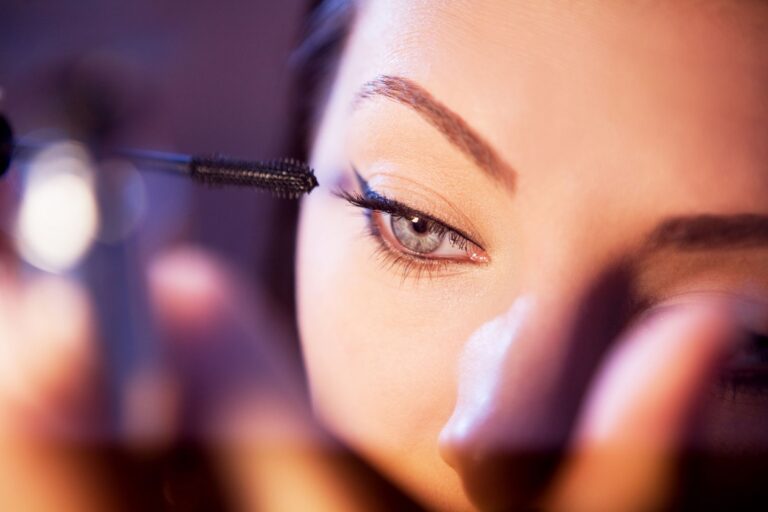
Furthermore, finishing your eye look with a coat of mascara is essential. The definition provided by mascara can enhance the overall blend and polish the look. I often use a volumizing formula that separates and defines the lashes, ensuring that my blended colors remain the focal point.
Conclusion
Blending eyeshadow is both an art and a science, requiring practice and a solid understanding of techniques, color theory, and tool selection. By employing the proper techniques and taking the time to build color, you can achieve seamless transitions that bring your eye looks to life. Remember that the key to blending lies in patience and practice. As you refine your technique, you’ll discover what works best for your specific eye shape and style, allowing you to express your creativity through color. With each try, your skills will only improve, leading to looks that feel effortlessly polished.